用 game of life 來展示 Rust 跟 WebAssembly 的開發真的是個很好的例子, 可以充分展現 javascript 和 wasm 間如何傳遞資料,這篇我認為會是學習開發 Rust/WebAssembly 的精華所在。
Javascript 與 WebAssembly 的介面
首先 WebAssembly 的定位並不是取代 javascript,而是作為 javascript 的一個補充工具, 在 javascript 裡面,記憶體是含垃圾收集的 heap memory;WebAssembly 則是一塊線性的記憶體, 到目前為止 WebAssembly 都無權碰 javascript 的 heap memory,反之 javascript 則有權讀寫 WebAssembly 的記憶體內容, 但只有基本型態 u8, i32, f64 等的 ArrayBuffer;WebAssembly 的函式也只能接收/回傳純量資料型態。
這就是 javascript 跟 webassembly 所有溝通方式了,純量可以經由函式參數跟回傳值,陣列資料就只能由 javascript 來進行讀寫。
為了避免無謂的資料複製,最有效率的方式是由 javascript 把大量資料塞進 WebAssembly 的線性記憶體,
然後以純量傳 handler 給 WebAssembly 讓 WebAssembly 做大量計算,最後只回傳一個小小的資料,避免一直複製資料的成本。
第一個實作,我們會把 game of life 每個 cell 的資料放在 WebAssembly 的線性記憶體內,
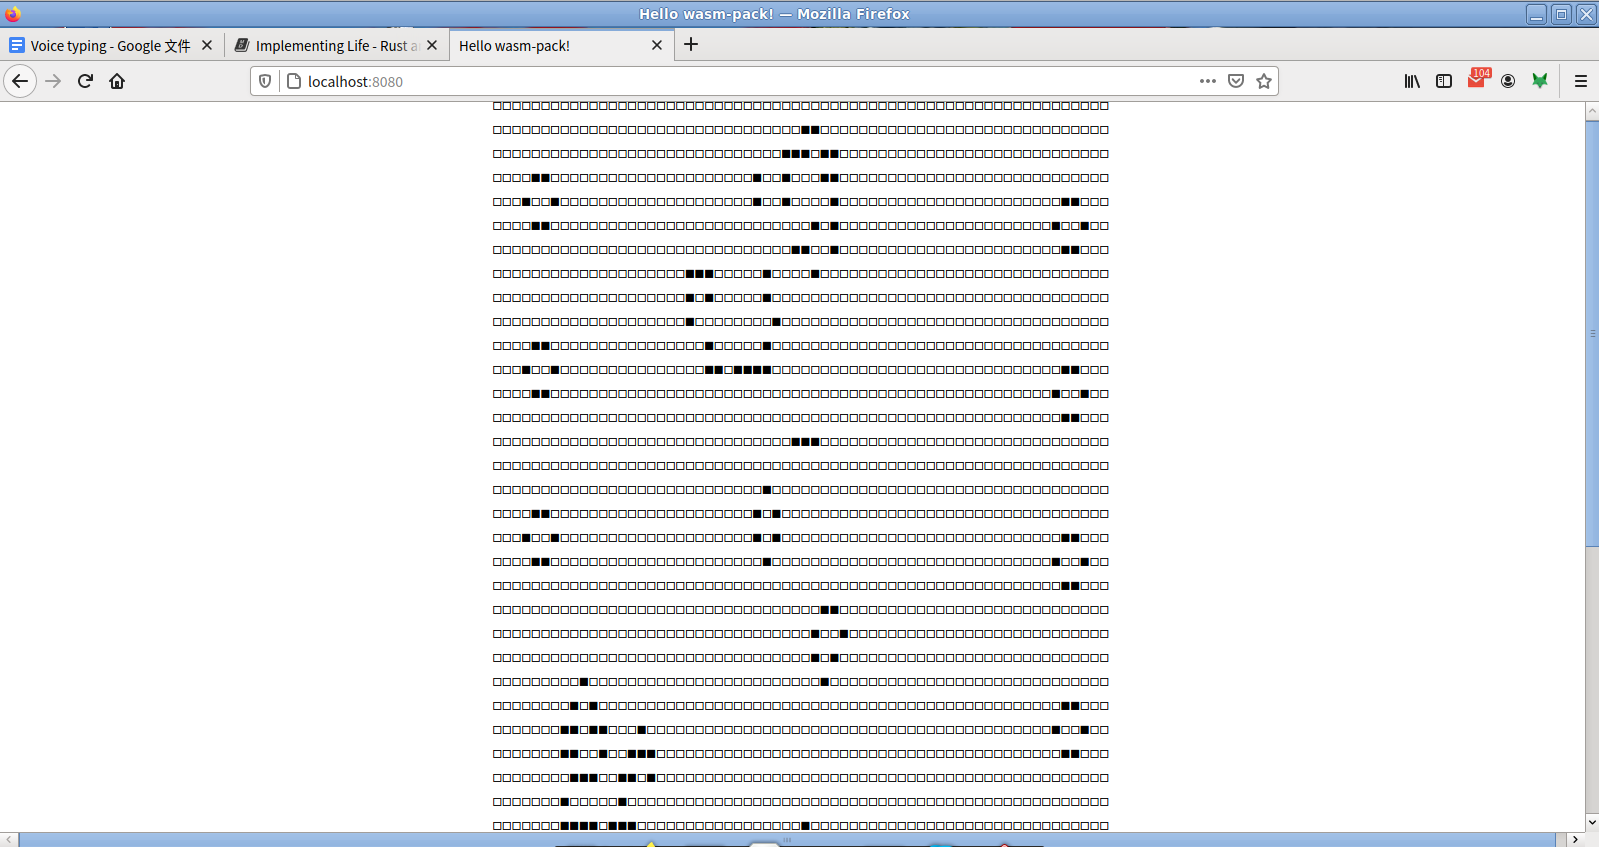
顯示由 WebAssembly 寫出 String,javascript 將 string 寫入 html 的 textContent。
第二個實作,則會讓 WebAssembly 把結果寫入線性記憶體,javascript 依照結果更改 DOM 的內容,減少線性記憶體和 javascript heap 間的資料複製。
實作 game of life
首先把 lib.rs 不會用到的 alert, greet 都刪掉,並新增下面的內容:
#[wasm_bindgen]
#[repr(u8)]
#[derive(Clone, Copy, Debug, PartialEq, Eq)]
pub enum Cell {
  Dead = 0,
  Alive = 1,
}
加上 wasm_bindgen 表示這個資料結構能讓 javascript 取用;repr(u8) 內部使用 1 個 byte 表示這個 enum。
再來實作作圖的空間 Universe:
#[wasm_bindgen]
pub struct Universe {
  width: u32,
  height: u32,
  cells: Vec<Cell>,
}
在實作 WebAssembly 的時候,struct 可以有兩個 impl,有 wasm_bindgen 的 impl 會被公開到 javascript API, 沒有的 impl 則是內部函式,如下面的 get_index 和 live_neighbor_count:
impl Universe {
  fn get_index(&self, row: u32, column: u32) -> usize {
    (row * self.width + column) as usize
  }
  fn live_neighbor_count(&self, row: u32, column: u32) -> u8 {
    let mut count = 0;
    for delta_row in [self.height - 1, 0, 1].iter().cloned() {
      for delta_col in [self.width - 1, 0, 1].iter().cloned() {
        if delta_row == 0 && delta_col == 0 {
          continue;
        }

        let neighbor_row = (row + delta_row) % self.height;
        let neighbor_col = (column + delta_col) % self.width;
        let idx = self.get_index(neighbor_row, neighbor_col);
          count += self.cells[idx] as u8;
        }
      }
    count
  }
}
實作計算下一個狀態的函式,這個函式我們公開讓 javascript 可以呼叫:
#[wasm_bindgen]
impl Universe {
  pub fn tick(&mut self) {
    let mut next = self.cells.clone();

    for row in 0..self.height {
      for col in 0..self.width {
        let idx = self.get_index(row, col);
        let cell = self.cells[idx];
        let live_neighbors = self.live_neighbor_count(row, col);

        let next_cell = match (cell, live_neighbors) {
          (Cell::Alive, 2) | (Cell::Alive, 3) => Cell::Alive,
          (Cell::Alive, _) => Cell::Dead,
          (Cell::Dead, 3) => Cell::Alive,
          (otherwise, _) => otherwise,
        };
        next[idx] = next_cell;
      }
    }
    self.cells = next;
  }
}
最後讓我們為 Universe 實作 format 函式
use std::fmt;

impl fmt::Display for Universe {
  fn fmt(&self, f: &mut fmt::Formatter) -> fmt::Result {
    for line in self.cells.as_slice().chunks(self.width as usize) {
      for &cell in line {
        let symbol = if cell == Cell::Dead { '◻' } else { '◼' };
        write!(f, "{}", symbol)?;
      }
      write!(f, "\n")?;
    }
    Ok(())
  }
}
最後是所有其他的介面函式,Constructor 跟寫出字串的介面,constructor 這邊是生成固定的 pattern, 如果想要由 javascript 生成 pattern 的話要做些修改,在 Gameboy 的例子上會看到:
#[wasm_bindgen]
impl Universe {
    pub fn new() -> Self {
        let width = 64;
        let height = 64;

        let cells = (0..width * height)
            .map(|i| {
                if i % 2 == 0 || i % 7 == 0 {
                    Cell::Alive
                } else {
                    Cell::Dead
                }
            })
            .collect();

        Universe {
            width,
            height,
            cells,
        }
    }

    pub fn render(&self) -> String {
        self.to_string()
    }
}
這樣就寫完我們 Game of Life 的 Rust 實作了。
網頁實作
在 index.html 的內容加上一個 <pre>:
<body>
  <pre id="gameboy-canvas"></pre>
  <script src="./bootstrap.js"></script>
</body>
修改 index.js 如下:
import { Universe } from "wasm-gameboy";

const pre = document.getElementById("gameboy-canvas");
const universe = Universe.new();

const renderLoop = () => {
  pre.textContent = universe.render();
  universe.tick();

  requestAnimationFrame(renderLoop);
};
requestAnimationFrame(renderLoop);
同樣啟動 npm run start 並瀏覽 localhost:8080 就能看到 Game of Life 的實作結果:

直接讀取記憶體
上面這個實作的 render 流程是這樣子的,每當 javascript 呼叫 Rust 的 render,wasm 會在內部的記憶體分配這個 string 的空間,
透過 wasm-bindgen 的 API 轉成 javascript 的 textContent 來顯示。
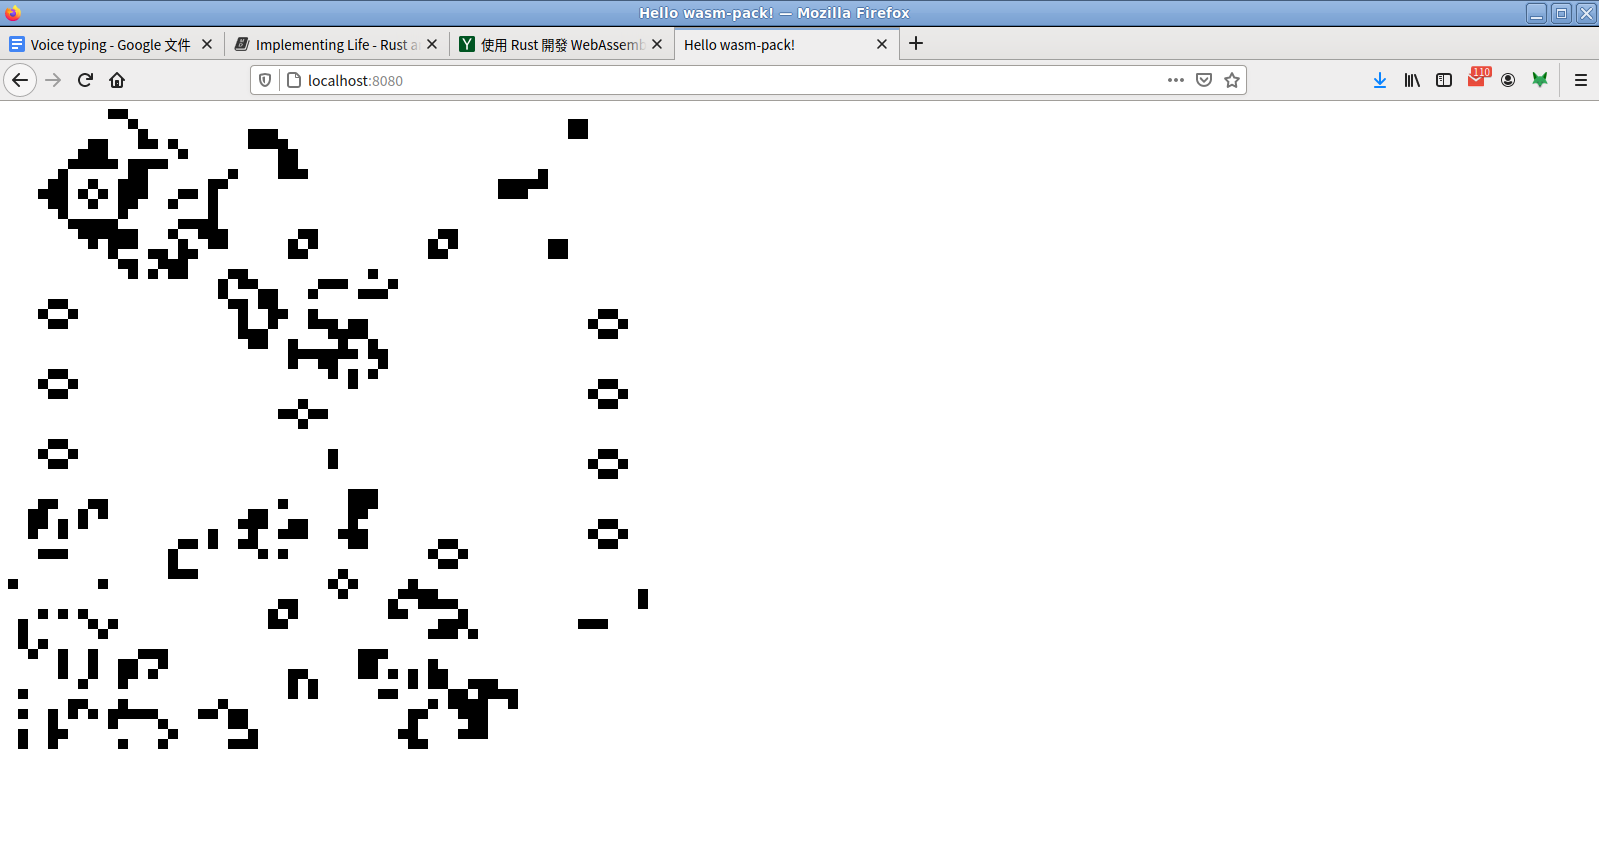
但是,其實 javascript 從外部就讀寫 wasm-bindgen 的記憶體,記憶體分配和複製是可以省下來,讓 render 函式直接回傳 Universe 裡面 Vec<Cell> 的記憶體位置讓 javascript 去讀;顯示也改用 canvas 直接畫出來。
首先把 html 裡面的 pre 改換成 canvas
<body>
  <canvas id="gameboy-canvas"></canvas>
  <script src="./bootstrap.js"></script>
</body>
Rust 的部分,我們需要以下幾個函式讓 javascript 呼叫,注意 cells 函式的實作,
它會把 Universe 裡面的 Vec<Cell>,以 pointer 的方式回傳位址回去:
#[wasm_bindgen]
impl Universe {
    pub fn width(&self) -> u32 {
        self.width
    }

    pub fn height(&self) -> u32 {
        self.height
    }

    pub fn cells(&self) -> *const Cell {
        self.cells.as_ptr()
    }
}
最後,是 index.js 的部分,讓我們做些修改,這裡我就懶得畫格線了:
import { Universe, Cell } from "wasm-gameboy";
import { memory } from "wasm-gameboy/wasm_gameboy_bg";

const PIXEL_SIZE = 10;
const COLOR_BLACK = "#000000";
const COLOR_WHITE = "#FFFFFF";

const universe = Universe.new();
const width = universe.width();
const height = universe.height();

const canvas = document.getElementById("gameboy-canvas");
canvas.height = CELL_SIZE * height;
canvas.width = CELL_SIZE * width;

const ctx = canvas.getContext('2d');

const renderLoop = () => {
  universe.tick();
  drawCells();
  requestAnimationFrame(renderLoop);
};
requestAnimationFrame(renderLoop);
這部分沒變太多,要看懂 wasm 的 Cell 結構,除了 Universe 外我們也要引入 Cell; 從 wasm-gameboy-bg 引入 memory 這樣才能讀寫 WebAssembly 的記憶體; 用新開的介面取得 height 跟 width,呼叫 tick() 更新。
const drawCells = () => {
  const buffer = universe.cells();
  const cells = new Uint8Array(memory.buffer, buffer, width * height);

  ctx.beginPath();

  for (let row = 0; row < height; row++) {
    for (let col = 0; col < width; col++) {
      const idx = getIndex(row, col);

      if (cells[idx] == Cell.Dead) {
        ctx.fillStyle = COLOR_WHITE;
      } else if (cells[idx] == Cell.Alive) {
        ctx.fillStyle = COLOR_BLACK;
      }

      ctx.fillRect(
        col * PIXEL_SIZE,
        row * PIXEL_SIZE,
        PIXEL_SIZE,
        PIXEL_SIZE
      );
    }
  }

  ctx.stroke();
};
注意開頭的兩行,透過 memory.buffer,我們可以拿到 WebAssembly 的記憶體位址,
WebAssembly cells 函式會取得指向 WebAssembly 中 Vec<Cell> 陣列的偏移量,型態是 number。
如果我用 console.log 印出 buffer 的值, 會看到它在兩個值 1118256 跟 1114120 間來回跳動,
這是因為我們在 WebAssembly 裡面,每個 tick() 都會分配一塊新的記憶體, 計算出新的狀態後把舊的記憶體給回收,
直到下一輪 tick() 再次分配上回釋放掉的記憶體。
我們在對應的位置產生一個 Uint8Array ,就能取值來讀取內容,可以從 Cell.Dead/Cell.Alive 看到,只要有 import javascript 就能直接看懂
WebAssembly 的型態定義。
打開網頁看看實作的結果:

其他
寫這篇文的時候,台灣的武肺疫情又變嚴重了,在此呼籲大家戴口罩、勤洗手,然後改寫 Rust。