這次的更新比較久一點,故事是這樣子的,在試完 HDMI 之後,我花了一點時間在試著連 FPGA 版上有實體 chip 的其他裝置, 包括:SDRAM、Flash 跟 SDcard。問題是這幾個都沒那麼好連,特別是沒有 LA 的狀況下根本就是瞎子摸象, 只能用 verilator 跑跑波型,波型對了放上去不會動你也不知道是什麼問題。
其實一般來說,這種奇奇怪怪的元件都會用專用工具,例如 Altera/Quartus, Xilinx/Vivado 來處理,工具內含 FPGA 廠自己的 controller IP, 點點滑鼠就能叫出一大團模組搞定這些元件;記得還在學的時候,比我早半年修課的博神就沒上這套,自己手爆 DRAM controller , 到我們這學期的時候大家突然從某個 blog 學到怎麼用 Altera 提供的 DRAM controller IP,從此沒人要(也不需要)自幹稀奇古怪的 controller 了。
我用的 Lattice 工具是 Lattice/Diamond,只要註冊了免費帳號就能使用,我目前是還沒開通,畢竟是 open FPGA 能避免用私有 tool 就儘量避開, 目前查到最有可能使用的開源 library 是 litedram ,有機會的話再來嘗試看看。
BRAM
當我還在苦惱沒有 SDRAM, Flash 的時候,傳說中在 Boston 大殺四方的強者我同學瑞陽大神建議我可以先試用 FPGA 內建的 Block RAM,
不用像 DRAM 還要管時序、充電等一堆 GGYY 的問題,使用起來跟 logic 一樣簡單,還可以在燒錄的時候將預設值給存進去,
這對我之後的 project 會有很大的助益。
icesugar-pro 上面的確有附 1008 Kb 的 Block RAM,注意是 K bits 不是 K bytes,底層是 56 個 DP16KD 18 Kb 的元件組成,可
以參考 Lattice 的文件 TN1264 ECP5 and ECP5-5G Memory Usage Guide。
作為驗證的 project ,我打算把一張圖片塞進 BRAM 裡面,代替上一集的 vgatestsrc,用 HDMI 來顯示圖片,
但因為只有 1008 Kb 的關係,我們就要好好規劃要怎麼用它。
screen 尺寸是 640x480,也就是 307200 pixel,DP16KD 支援幾種模式,定址/資料寬度為 16384/1, 8192/2, 4096/4, 2048/9, 1024/18,我不確定為什麼要設計成 18Kb 這個奇怪的數字,總之用下表除一下:
| num of DP16KD | |
| data width 1 | 19 |
| data width 2 | 38 |
| data width 4 | |
| data width 9 | |
| data width 18 |
呃…基本上限制 56 個 DP16KD 下這根本不可能,除非 pixel 用 1 bit 表示,這樣就只有黑白兩色變成 Bad Apple ,不然就是 2 bits 只有 4 色灰階跟 gameboy 一樣。
解決方法就是把畫面縮小,降到 320x240 就只需要 76800 pixels:
| num of DP16KD | |
| data width 1 | 5 |
| data width 2 | 10 |
| data width 4 | 19 |
| data width 9 | 38 |
| data width 18 |
這樣就至少有 9 bits 可以表示色彩,總計 76800 個 pixels 塞進 38 個 DP16KD 裡面。
BRAM module
BRAM 的使用可以參考我搜尋到的這份上課講義
,基本上就是照著寫,建議獨立成一個檔案,
公開的介面就是 clock, reset, write enable, read enable,以及 read/write 的 address 跟 value。
使用 parameter 讓這個 module 的使用者可以設定使用不同寬度跟深度的記憶體,一般來說 SIZE parameter 應該可以用 (1<<DEPTH),
但在本例裡面不行,我的 DEPTH $clog2(76800) 是 17 個 bits,但 1<<17=131072 會需要 64 個 DP16KD,會超過使用上限,
因此我們把 SIZE 獨立成一個 parameter。
module bram (
  input clk,
  input re,
  input we,
  input [DEPTH-1:0] addr_rd,
  input [DEPTH-1:0] addr_wr,
  output logic [WIDTH-1:0] data_rd,
  input [WIDTH-1:0] data_wr
);

parameter WIDTH=8;
parameter DEPTH=8;
parameter SIZE=(1<<DEPTH);
下面我們用 ram 這樣的寫法,宣告這是一塊記憶體區塊;並且用 readmemh/readmemb 來初始化這塊空間。
讀寫的部分就沒什麼了,這裡寫得複雜一點有可能導致合成器把這塊 ram 判定為不是 memory,因此保持簡單就好,不要加太多的 if 條件等等。
logic [WIDTH-1:0] ram [0:SIZE-1];
initial begin
  $readmemb("data.bin", ram);
end

always_ff @(posedge clk) begin
  if (we) begin
    ram[addr_wr] = data_wr;
  end
end

always_ff @(posedge clk) begin
  if (re) begin
    data_rd <= ram[addr_rd];
  end
end
source module
我們重製一個決定現在要顯示什麼的模組,會接收從 hdmi 模組來的 newframe 跟 enable signal,得到目前在顯示螢幕的哪個位置。
module imagesrc (
  input clk,
  input rst,
  input i_newframe,
  input i_newline,
  input i_enable,
  output logic [23:0] pixel
);

localparam WIDTH = 640;
localparam HEIGHT= 480;

int counterX, counterY;
always_ff @(posedge clk or negedge rst) begin
  if (!rst) begin
    counterX <= 0;
    counterY <= 0;
  end
  else begin
    if (i_newframe) begin
      counterX <= 0;
      counterY <= 0;
    end
    else if (i_enable) begin
      counterX <= (counterX == WIDTH-1) ? 0 : counterX+1;
      counterY <= (counterX == WIDTH-1) ? counterY+1 : counterY;
    end
  end
end
實體化一塊 bram 出來,要顯示的資料就從 bram 裡面拿;
因為螢幕尺寸仍然是 640x480,這裡我們用 4 個 pixel 併成一個 pixel,把 bram 裡儲存的 320x240 畫面放大到 640x480。
取出來的 data 我們補上 5 個 0 就還原成原本的顏色,當然這個顏色一定是破壞性的,效果等等就會看到。
logic [8:0] read_byte, write_byte; assign write_byte = 9'b0;
bram #(
  .WIDTH(9),
  .DEPTH(17),
  .SIZE(76800)
) bram_i (
  .clk(clk),
  .re(1'b1),
  .we(1'b0),
  .addr_rd(((counterY >> 1) * 320) + (counterX >> 1)),
  .addr_wr(counterX),
  .data_rd(read_byte),
  .data_wr(write_byte)
);

assign pixel = {
  read_byte[8:6], 5'b0,
  read_byte[5:3], 5'b0,
  read_byte[2:0], 5'b0
};
初始化
圖片處理就用 python PIL,把尺寸調好,每個 pixel 的顏色只取前三個 bit,把顏色壓到 9 bit 的色彩空間。
im = Image.open(sys.argv[1])
nim = im.resize((320, 240), Image.BILINEAR)
pixels = nim.load()

out_color = []
for y in range(nim.height):
  for x in range(nim.width):
    pixel = nim.getpixel((x, y))
    convert_pixel = ((pixel[0] >> 5) << 6) | ((pixel[1] >> 5) << 3) | ((pixel[2] >> 5) & 0x7)
    out_color.append(convert_pixel)

    with open("data.hex", "w") as f:
    for (idx, pixel) in enumerate(out_color):
      f.write("{0:09b}\n".format(pixel))

nim.save("result.jpg")
注意 readmemh/readmemb 是這樣子的,當我們設定記憶體的資料寬度為 9 bits,那麼你在讀入的檔案中,一行資料就只能放 9 個 bits,
後面多出來的會自動被 readmemh/readmemb 給忽略掉,我被這個害到 debug 超久。
可以想像記憶體就是一個寬度 9 bits,長度很長的表格,你的檔案則是一行對應一行,記憶體有多長你的檔案就要有幾行,這裡輸出的檔案就要有 76800 行;readmemh 也是同理。
JohnJohnLin:請不要高估 verilog tool 的智商
編譯
當我們宣告 bram 之後,在編譯的時候可以去翻一下編譯訊息,可以找到以下幾個區塊:
=== top ===
   Number of wires:               1112
   Number of wire bits:           3374
   Number of public wires:        1112
   Number of public wire bits:    3374
   Number of memories:               0
   Number of memory bits:            0
   Number of processes:              0
   Number of cells:               1437
     CCU2C                          90
     DP16KD                         38
     EHXPLLL                         1
     L6MUX21                        82
     LUT4                          874
     MULT18X18D                      1
     PFUMX                         172
     TRELLIS_FF                    179
我們的確使用了 38 塊 DP16KD block memory。
另外,這邊出現的名字可以在 ecp5 primitives
裡面找到,可以看到還有一些有趣的元件我們還沒用。
中間也會出現一大段,在初始化我們 block ram 的步驟:
8.27.2. Continuing TECHMAP pass.
Using template $paramod$01df504a65f2d94718886dbfdd86d5f499d64b7c\$__ECP5_DP16KD for cells of type $__ECP5_DP16KD.
Using template $paramod$cb898ab177f8fbcb755d42a35a12bb5931814187\$__ECP5_DP16KD for cells of type $__ECP5_DP16KD.
Using template $paramod$eb837c18a4f2a9c7913382312cd444e187e3de18\$__ECP5_DP16KD for cells of type $__ECP5_DP16KD.
Using template $paramod$bd9fe89f4e03a527e15e0806839d4843697c900c\$__ECP5_DP16KD for cells of type $__ECP5_DP16KD.
Using template $paramod$72ecbabb6d5a776a3026db442ab610e6797cd162\$__ECP5_DP16KD for cells of type $__ECP5_DP16KD.
Using template $paramod$c68977766aa6f05d42d4850f01b14ff1149d1517\$__ECP5_DP16KD for cells of type $__ECP5_DP16KD.
Using template $paramod$ecfa63c1e2cabec8195fb1e846ce3264fac49a7d\$__ECP5_DP16KD for cells of type $__ECP5_DP16KD.
另外,雖然依照文件,DP16KD 是 Dual Port,理論上可以支援兩套不同的輸入分別進行讀寫,不過這個目前用 yosys 還做不到,
會踩到一個還未實現的功能
,
Dual Port 的記憶體 yosys 在合成的時候都會 match 不上去,這個目前只能靜待 yosys 未來的更新,或者自己跳下去實現。
執行
用上面的 imagesrc 取代原本的 vgatestsrc,就可以看到我們存在裡面的圖片。
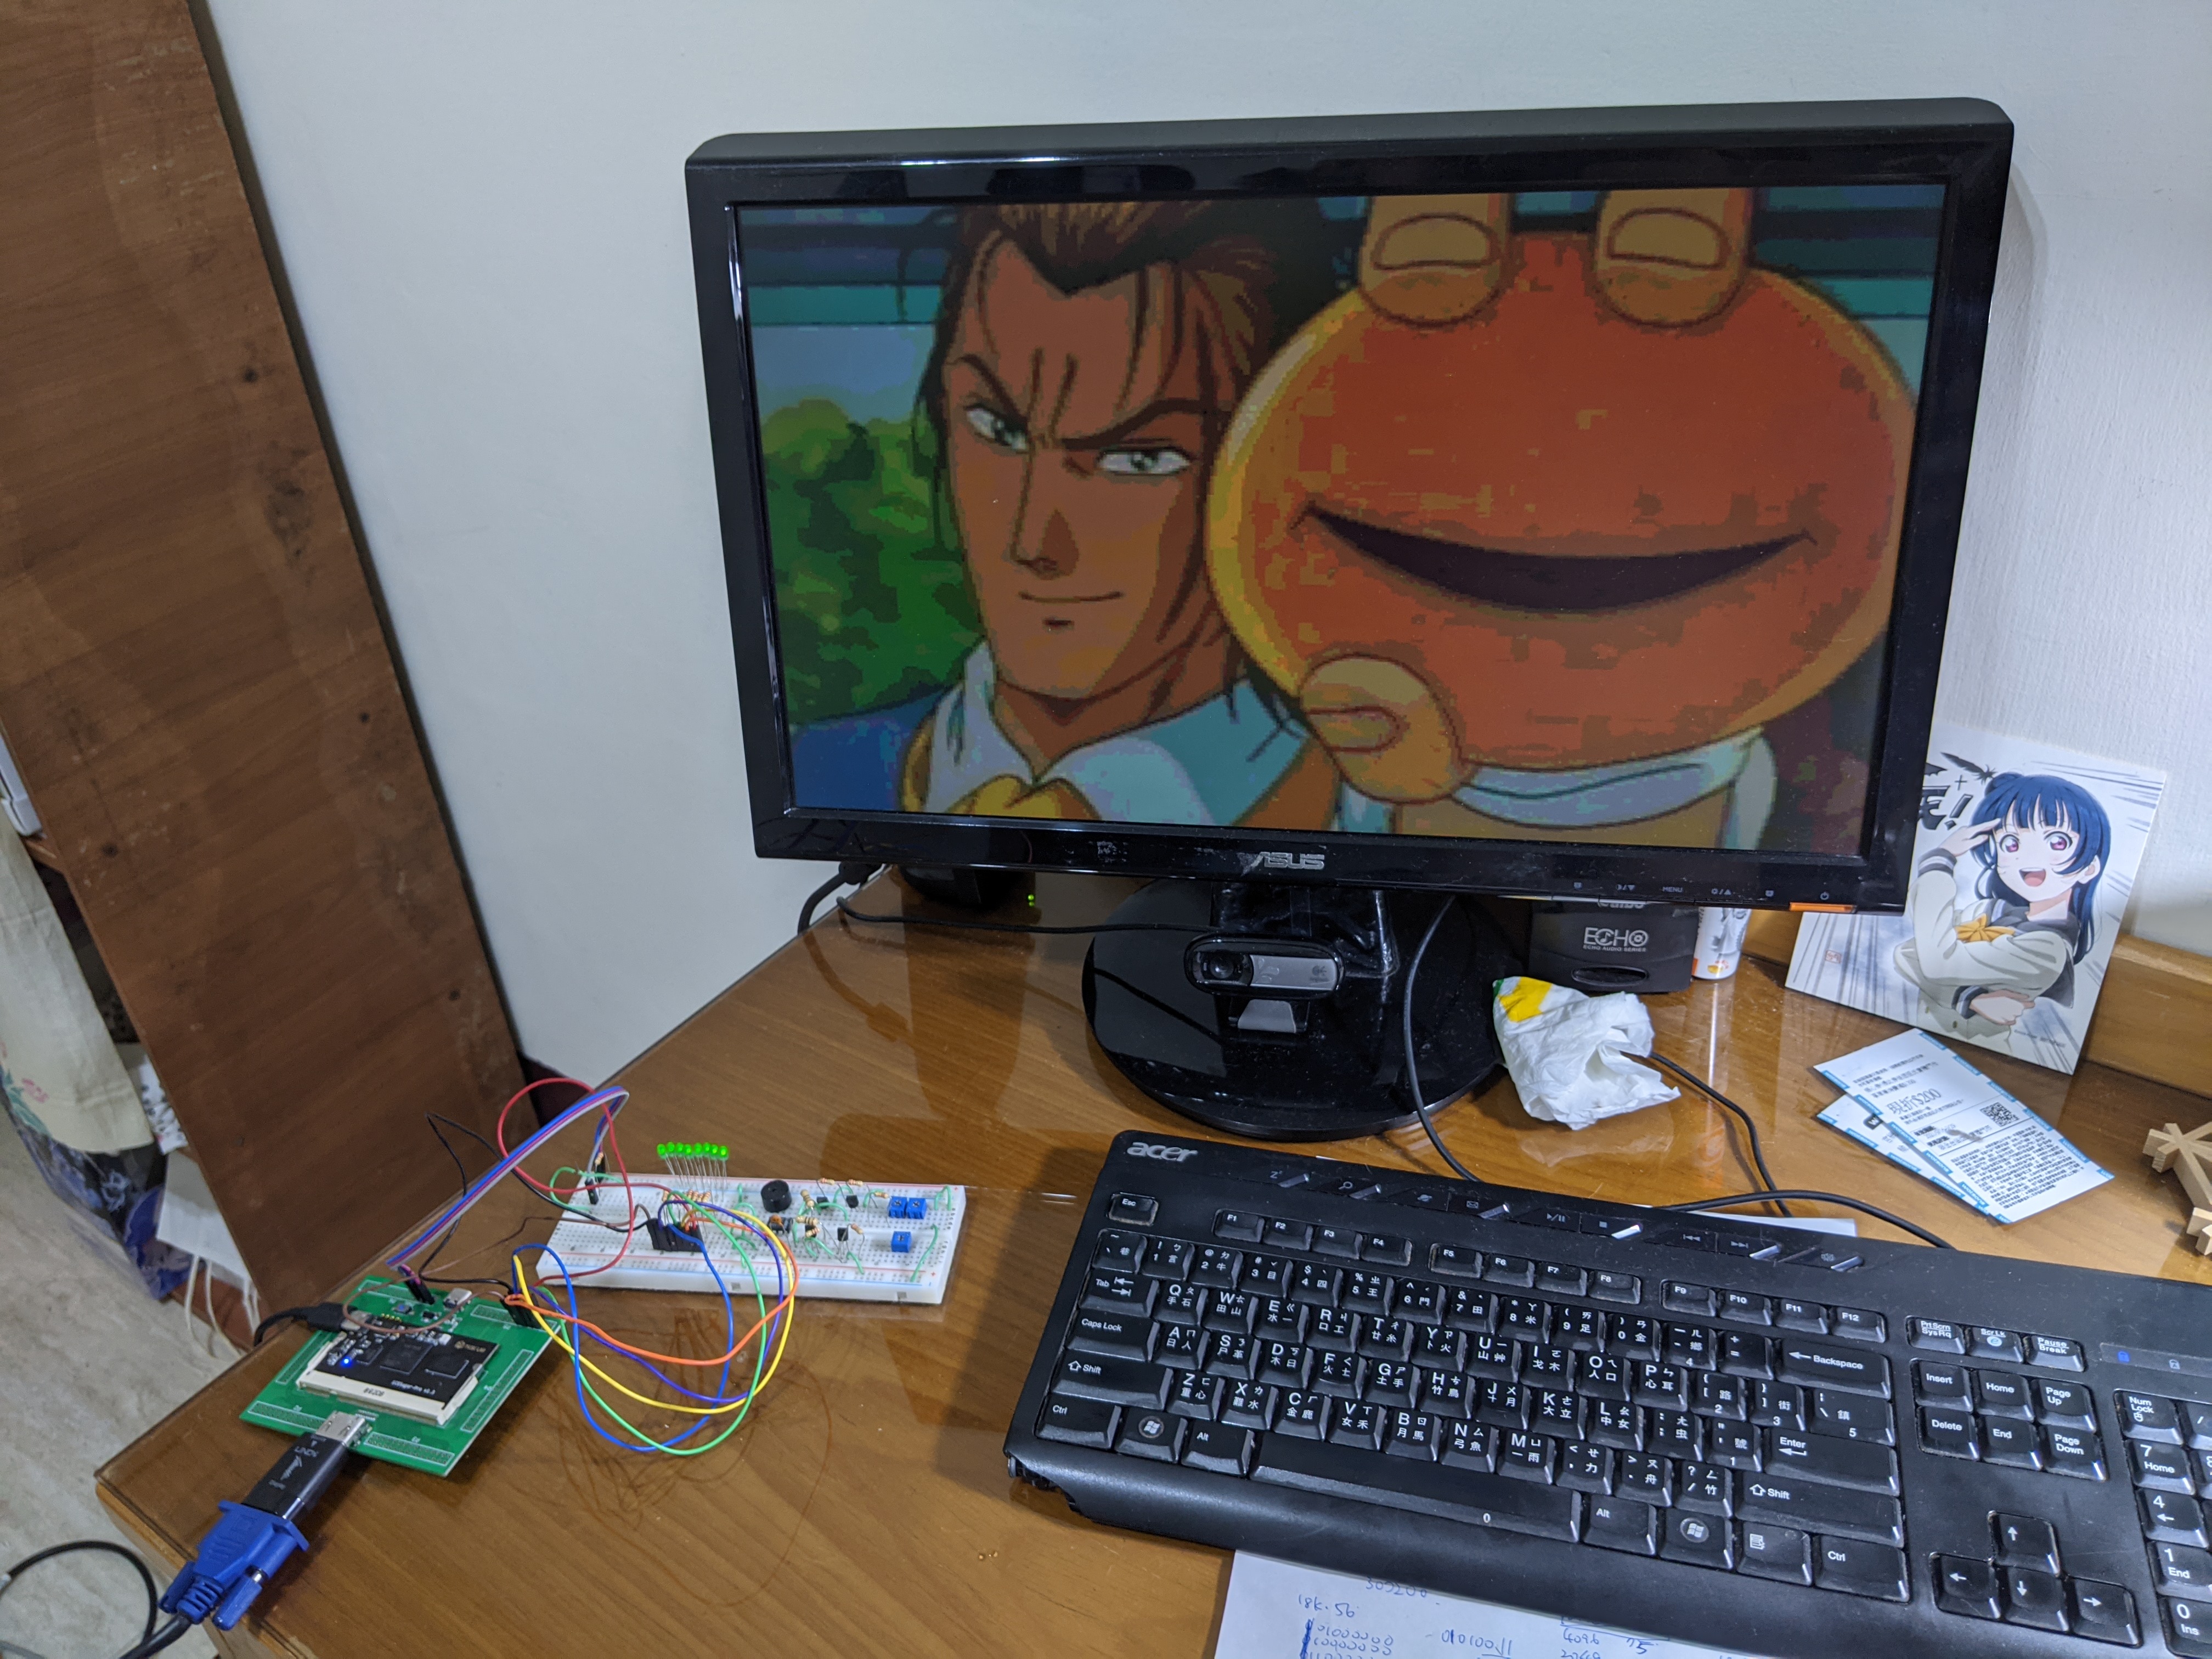
一時之間不知道要顯示什麼,就用最近在重播的中華一番,找了一張乃哥最帥的黃金peko笑開口笑。
應該很明顯顏色爆掉了,畢竟我們就只有 512 色,如果能打通 DRAM 應該就可以直上全彩,搞不好還能做投影片輪播了呢。
結語
我們這章打通了 BRAM,驗證了 BRAM 可以做到下列兩個我想要的功能:
- 隨機存取記憶體
- 從外面把想要初始化的內容塞進去讓 FPGA 存取
這等於是一大塊敲門磚,現在我們可以長驅直入,下一章應該能端一些非常有趣的東西出來。