This content is translated with AI. Please refer to the original Traditional Chinese version (zh-TW) for accuracy.
The story goes like this, this year’s COSCUP submitted a session on System Software. The session track host independently offered a submission reward, originally posted on Facebook:
To encourage students to submit and to experience the value of knowledge, after discussing with Mr. Jserv, we will provide two paid manuscript solicitation spots to the students here.
The first two students whose submissions are accepted will receive a reward of 2,500 NTD and an FPGA development board with a RISC-V core capable of running Linux!
I declined the monetary reward. Ethically it wouldn’t be right for a salaried person to take this money, so it’s better left to student speakers more talented than me.
However, I accepted the FPGA, after evaluating since it’s hard to find. Previously our lab’s DE2
was priced over ten thousand NTD (and it’s discontinued now), and some projects without hardware lack a certain feel. I had always wanted an FPGA to play with, so I accepted the FPGA.
A few days after the delivery, I found it to be an icesugar-pro FPGA development board:
Specifications
Below is a photo of the actual product:
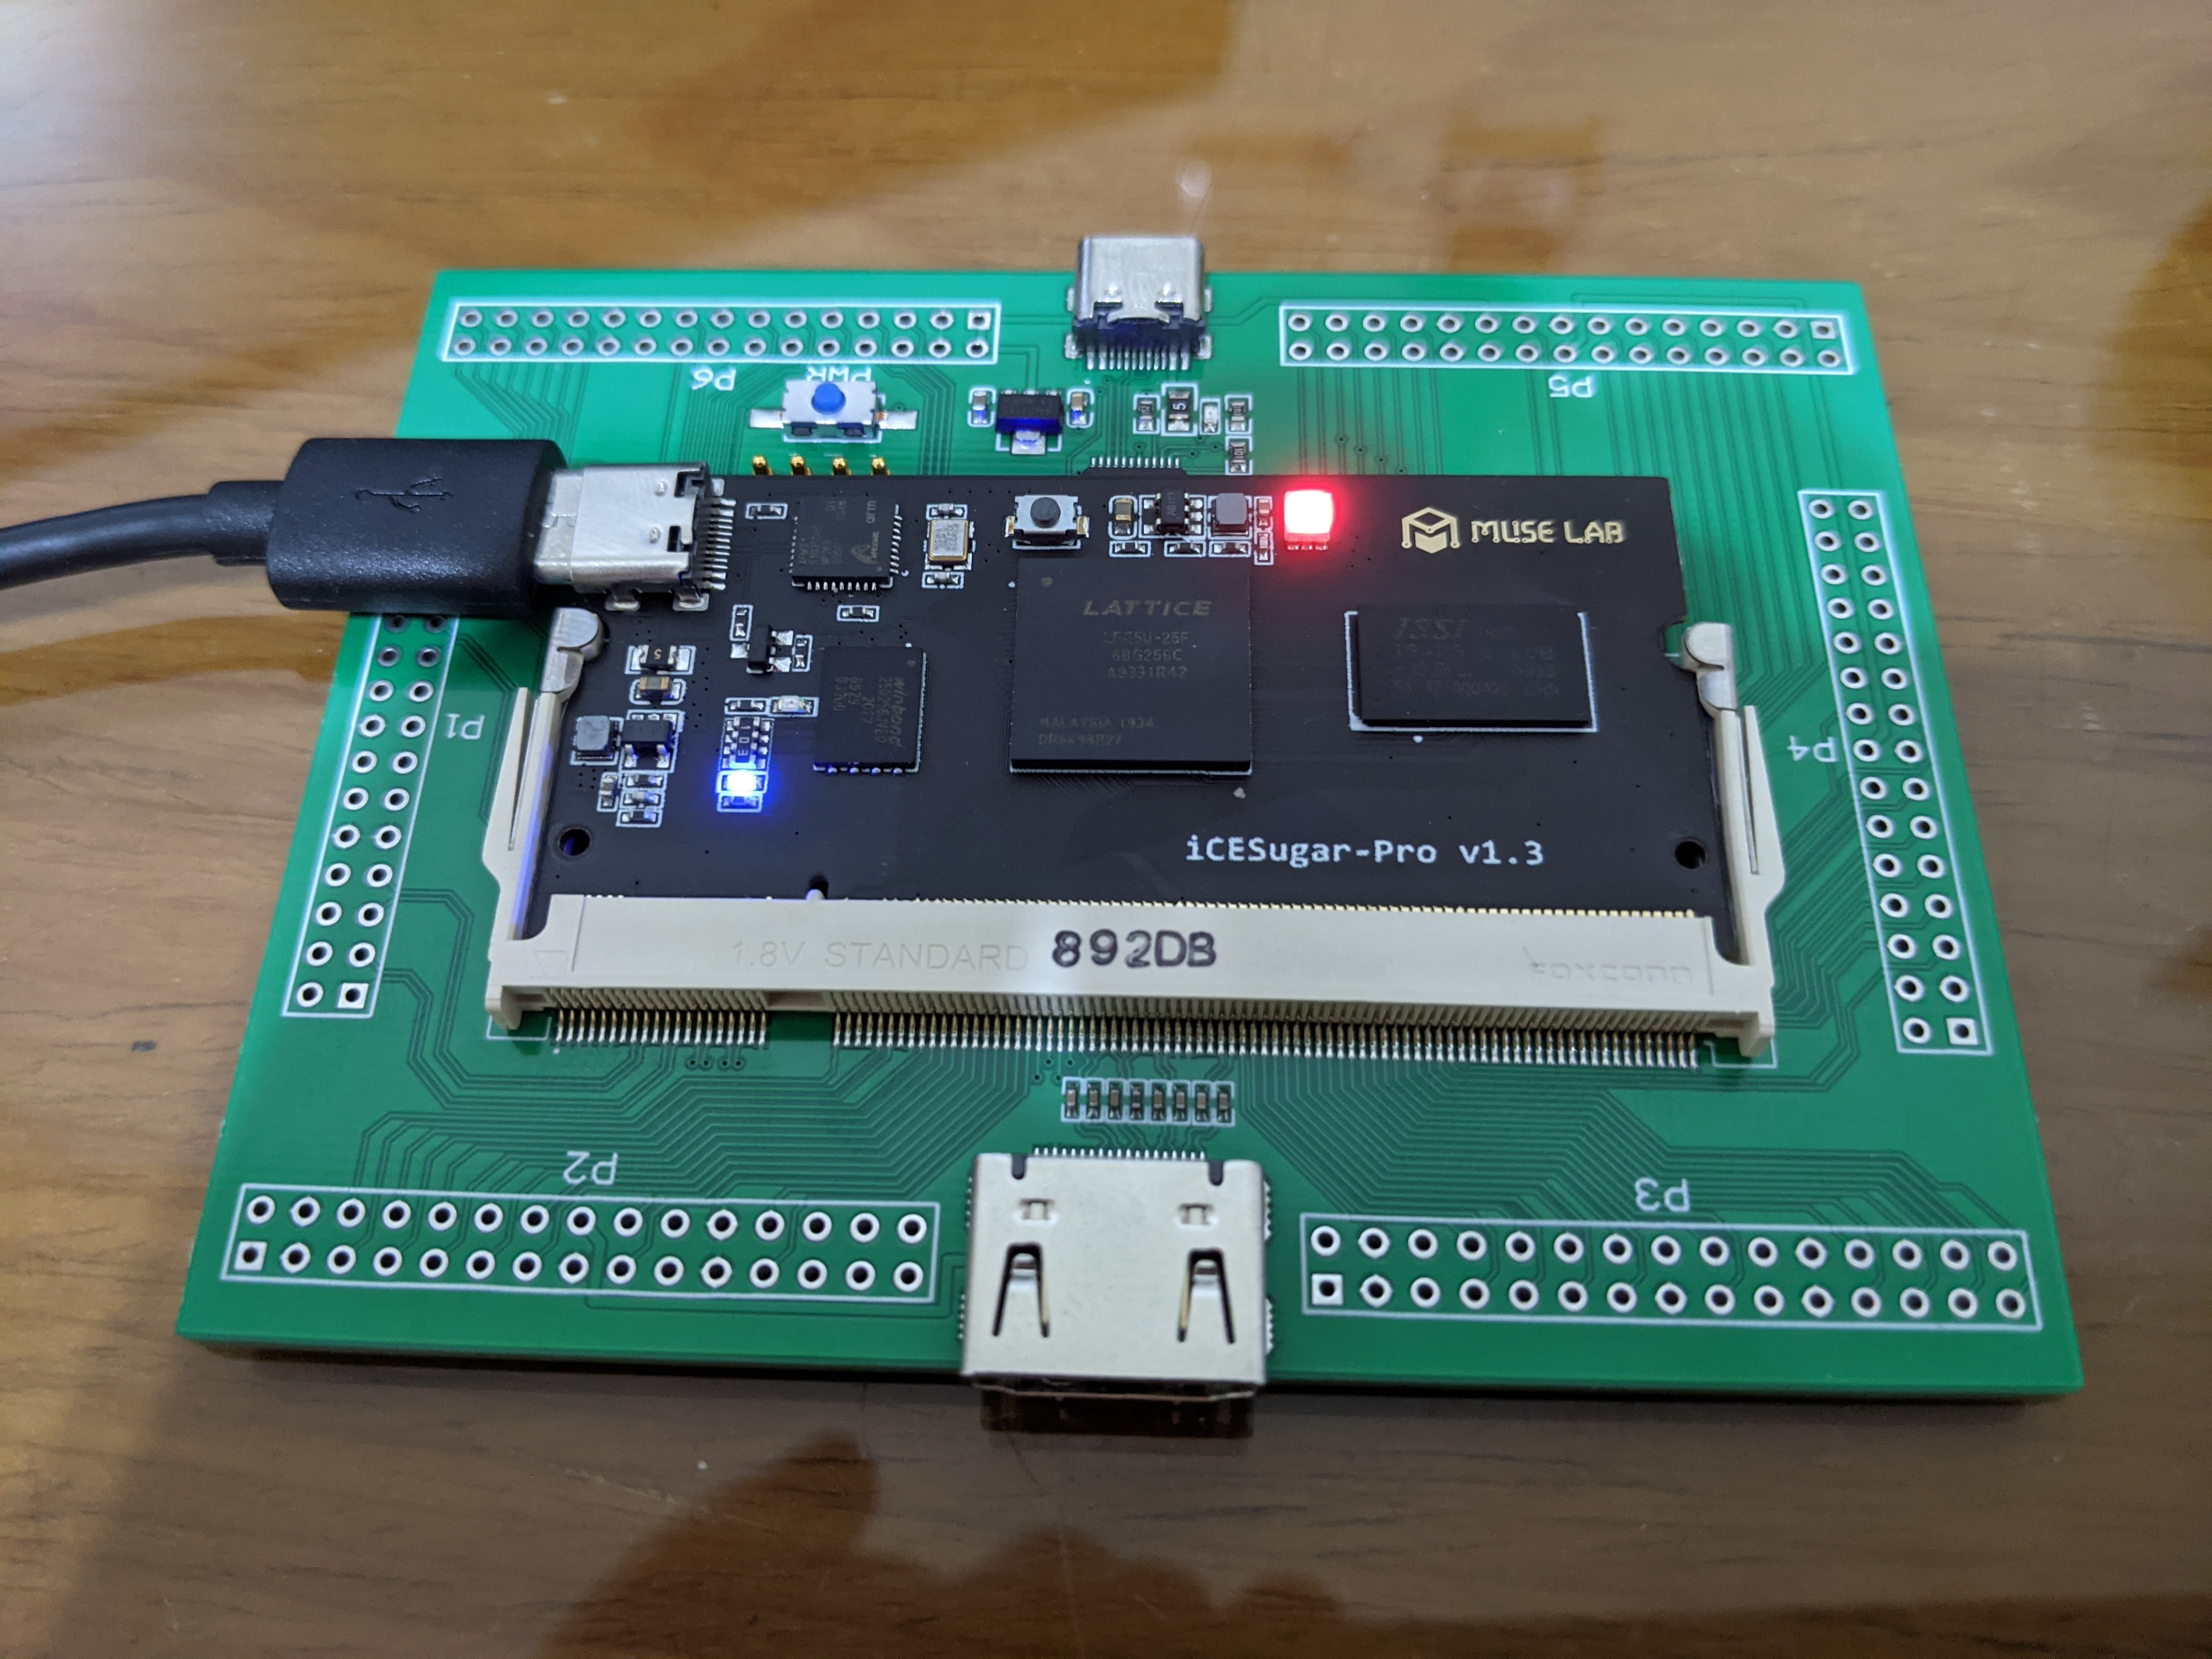
The mainboard in the middle includes Lattice’s FPGA, SDRAM, and FLASH:
- FPGA: ECP5 LFE5U-25F
- SDRAM: ISSI IS42S16160B (32MB)
- Flash: Winbond W25Q256JV (32MB)
The icesugar uses an ARM chip to provide iCELink for programming, making it very simple. After connecting it to a computer, it simulates a file system; just like copying files into a USB drive, and copying the .bin file completes the programming, easier than drinking water.
The FPGA used is from Lattice, the third largest in the FPGA industry, fully supporting open-source toolchains. Maybe because the top-ranked Xilinx takes the meat, the second-ranked Altera drinks the soup, leaving third-place Lattice just licking the bowl to feed, they chose to support open tools to attract the open-source community and independent players as help.
The Lattice ECP5 LFE5U-25F FPGA used on this board contains 24K LUTs (Look Up Table
), definitely sufficient for basic applications.
Via SODIMM you can connect to an expansion board, with a total of 106 usable I/O pins, eight of which connect to HDMI output. Personally, I feel the multimedia portion is a bit sparse unless you want to stubbornly use those 106 I/O pins; otherwise, buying professionally produced DE2 seems simpler XD.
Install Toolchain
Here is how to install the related toolchain on Archlinux. I must say this part is quite messy; there is no complete tutorial on this, and it still feels like the Warring States period of open-source, leading to the manuals, what the examples say, and what works often being completely different, feels a lot like reading MDN docs.
To play with FPGA, going all the way from verilog through to something we can program, we need the following tools :
- Synthesis: Typically called synthesis, synthesizing verilog RTL into logic gates.
- Place and Route: Routing, according to the logic gate count limitation, generating the connections of the logic gates.
- Bitstream Creation: Creating a bitstream file from the logic gate connections, according to the specific FPGA model for programming.
Visit the official page of the open-source toolchain icestorm, and searching “install” will show the recommended AUR tools for Archlinux:
- Synthesis: yosys-git, command yosys
- Place and Route: arachne-pnr-git, command arachne-pnr
- Bitstream Creation: icestorm-git, command icepack
Unfortunately, the tools that finally successfully generated the bitstream were these, except yosys, the other two were replaced,
- arachne-pnr is no longer supported, replaced by nextpnr
- icestorm may still work, but eventually, it succeeded with prjtrellis .
Install the development toolchain:
yay -S yosys
yay -S nextpnr-git # place and route
yay -S trellis-git
The bulkiest is yosys, compiling the entire installation took up 50 MB, it took me a bit of time; trellis-git isn’t small either. During the installation, I was watching “Seqalu: Formosa 1867” on hamivideo, and the video kept lagging, making me think once again that Chunghwa Telecom’s internet wasn’t up to par.
Blink LED
With these ready we can start writing some verilog, why do I seek out the hardship of writing verilog at my age QQ, it’s been since 2012 since I last wrote a verilog article, almost when I just started blogging on Blogger.
Let’s create a Hello World for FPGA: a blinking LED.
// blink.v
module blink (output reg led, input clk);
  localparam CNT_RST = 25_000_000;
  reg [24:0] counter;
  always @(posedge clk) begin
    if (counter == 25'd0) begin
      led <= led + 1;
      counter <= CNT_RST;
    end
    else begin
      counter <= counter - 1;
    end
  end
endmodule
As icesugar’s base frequency is 25 MHz, each time the counter reaches 0 the led is flipped, causing the LED to blink at 0.5 Hz.
Besides blink.v, we also need to prepare blink.lpf to instruct the routing software on how to connect the clk and led,
Referencing icesugar-pro’s schematic
(or you can also view the github README.md), prepare the lpf as follows:
LOCATE COMP "clk" SITE "P6";
IOBUF PORT "clk" IO_TYPE=LVCMOS33;
FREQUENCY PORT "clk" 25 MHZ;

LOCATE COMP "led" SITE "B11";
IOBUF PORT "led" IO_TYPE=LVCMOS25;
The entire compilation process is usually written as a Makefile:
$(TARGET).json: $(SRCS)
  yosys -p "synth_ecp5 -json $@" $^

$(TARGET)_out.config: $(TARGET).json $(TARGET).lpf
  nextpnr-ecp5 --25k --package CABGA256 --speed 6 \
  --json $< --textcfg $@ --lpf $(TARGET).lpf

$(TARGET).bin: $(TARGET)_out.config
  ecppack $< $@
yosys first converts our .v into a json file, the reason for using json is nextpnr only accepts json input;
nextpnr-ecp5 takes in the generated json and lpf files to produce the programming config; finally ecppack packages the config into a bit stream.
Using plain text Makefile to generate a bitstream seems a bit low-tech, indeed whether it’s Xilinx or Altera’s GUI applications, they merely encapsulate these commands for you.
Flashing
As mentioned, flash the generated blink.bit into it, and you’ll see the blinking LED, we set the port to B11, connected to the red LED; just modify the lpf file to make different LEDs light up.
Next Step
This step is basically to streamline the process, I’ve already confirmed open-source toolchains can indeed create programmable, executable bit streams reliably. Next, I’ll test how to connect the SDRAM and HDMI screen (though my home monitor can’t connect to HDMI cable…). As for what project to ultimately do, I haven’t decided yet; if anyone has ideas, feel free to leave a comment and let me know.